| © by Adorna |
|
Dirty Magic TricksOK.. I'm sorry if you expected some real magic here .. if you have some to spare I'm the first to want a tutorial from you! :) But for now - how about faking it?
I'll show you different effects .. maybe I'll add some more later on, too. You can use one of them, or better still combine them for whatever effect you want for your picture. some can be easily made with a mouse, others require you to draw somewhat. I suggest you do them on a seperate layer ... that way you can easily change them and use layer modes too.
|
|
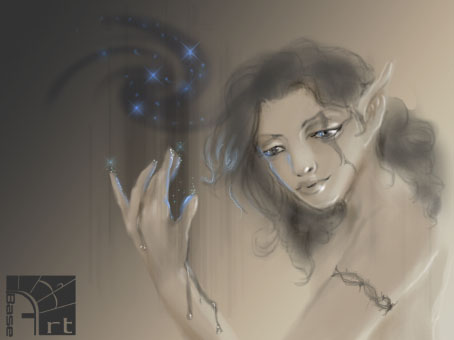
1. Sparkles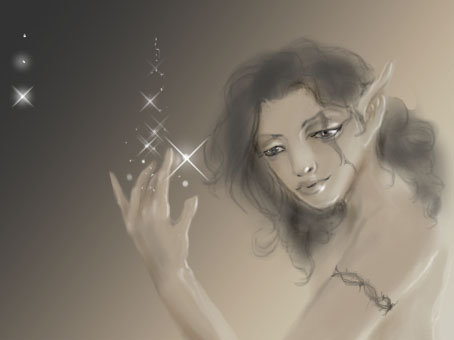
|
First and most simple effect are airbrush sparkles. You do them the same way you would with a real airbrush. Grab the airbrush tool and set your foreground color to white .. opacity about 30% .. now do a lot of small white dots where you want the sparcles to be. Set the airbrush tool to a bigger soft edged tip (16-40px) now and add a soft glow to some of them .. try to center the glow on an exitsting point. Next you need a tooltip that isn't in the standard palette .. so you have to load the tooltips .. select "various" and you should have completely new tooltips available, 2 of them are different sized x shapes that have soft edges. Select one of them and spray a few of your bigger dots. Done. |
..Colored Sparkles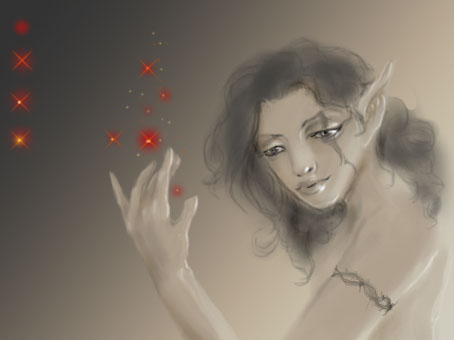
|
You can of course do this in color too. For this it is best to start with the glow in the color you want to use.Then make x with a lighter, warmer color, then the dots in a color that is very bright - perhaps even white. you can also make a smaller soft dot in this color over the last one too .. and add some small dots in all of the colors you used too. |
2. Simple Fire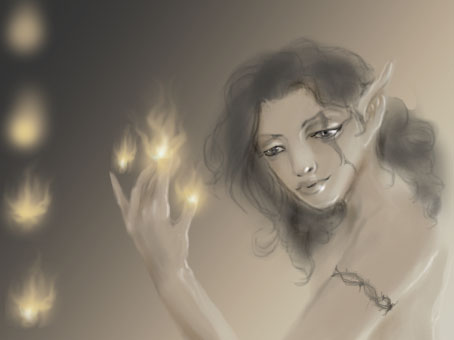
|
This is also one of the easiest things to do! |
3. Reflected Light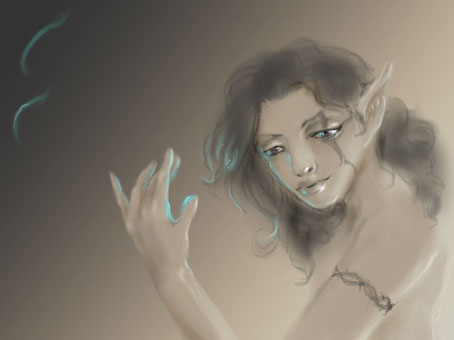
|
A little more artistic .. (means it involves drawing) .. refelected light. |
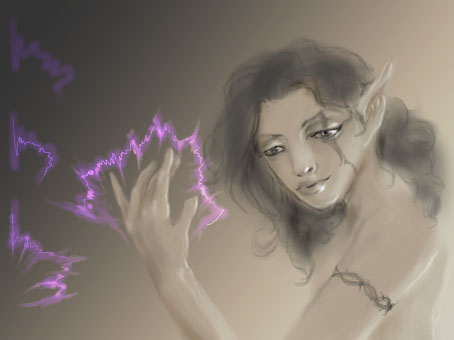
4. Electricity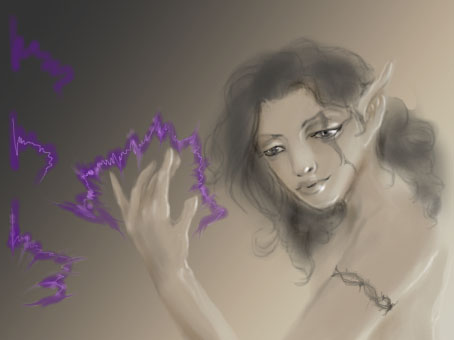
|
Draw a sloppy zigzag line and then a brighter, smaller one within it. (I think you got that idea by now:) ) add a few bright dots with a low opacity brush and use the smudge tool to work on some of the edges.. |
|
..then set the layer mode to color dodge. (looks a lot nicer now, right?) |
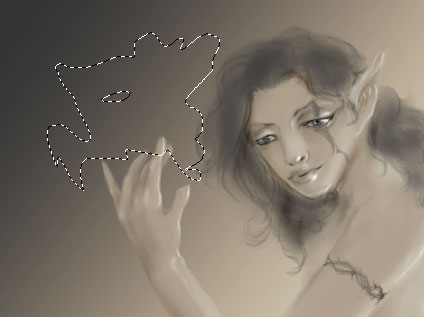
5. Smoke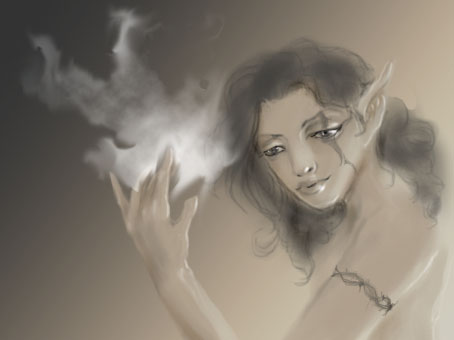
|
There are several ways to do smoke of course .. this is one of the easiest I think but its a bit harder to describe than the effects above. But I'll try my best. |
|
Make a irregular selection with the lasso tool. |
|
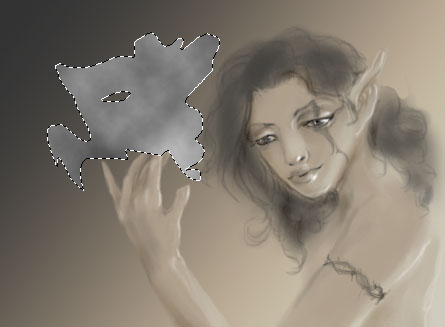
Set your colors to black and white (default)and select filters/render/clouds. |
|
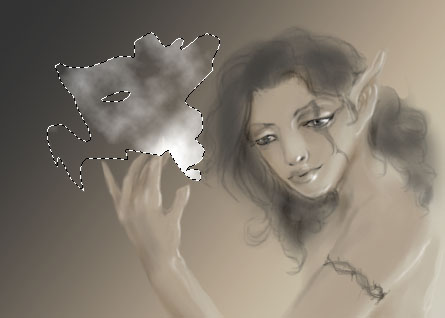
Set the layer to negative multiply and change contrast and brigthness until you have a nice irregular smoke pattern. |
|
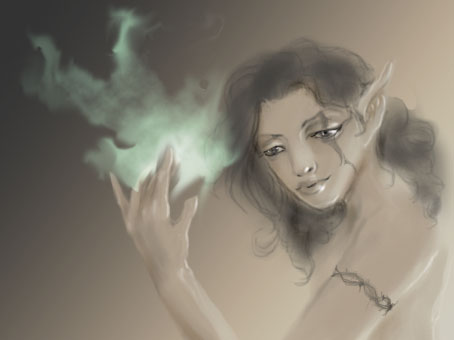
Now cancel the selection and smudge the rough brims a bit with a large brush. The nice thing about layers is that you can still adjust the position and size and opacity of your effect .. especially useful with effects like this one where you don't have that much control over the outcome. You can color the smoke too of course but the main part should stay white. |
|
I'll add more effects whenever they come to my mind .. you can of course send me things to include or request stuff (if I can find out how to do it)
Bye for now. The size shown is working resolution .. you should work bigger.. and I regret this myself. Perhaps I'll do a bigger res version - no promises though. If you have crits, comments and/or useful ideas mail me! |
|