|
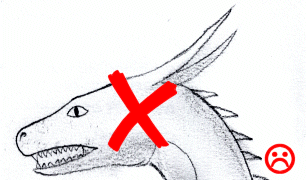 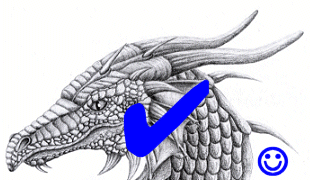
 Da ich schon ein paarmal gefragt wurde und sich das Schattieren irgendwie ohne ein Beispiel nur schlecht beschreiben lässt hab ich mich jetzt mal dazu entschlossen ein kleines Tutorial zu machen. Als Beispiel nehme ich eine recht einfache Pose von einem (zufälligerweise meinem *grins*) Drachenkopf, ein wenig schräg von der Seite. Hier zeige ich Euch Schritt für Schritt wie ich meine Drachenköpfe male.
 I was asked a few times how to shade a picture and this is difficult to describe without an example, so I decided to make this small tutorial. This is a relatively easy position of a dragon head (surprise: it's my head *grins*), viewed from the side and a bit from above. In this tutorial I'll show you how I draw my dragonheads step by step.
Negativ-Beispiel / Bad or Negative Example
 Negativbeispiel - Wie man es NICHT machen sollte
Zuerst möchte ich Euch ein Negativbeispiel zeigen. Es hat mich echt Überwindung gekostet sowas zu 'zeichnen' aber Bilder in dieser Art hab ich schon sehr oft im Internet gesehen.
 Bad/Negative Example - What you should NOT do
First I want to show you a bad example of shading. I really had to overcome myself to 'draw' something like this, but such pictures can be found very often in the internet.
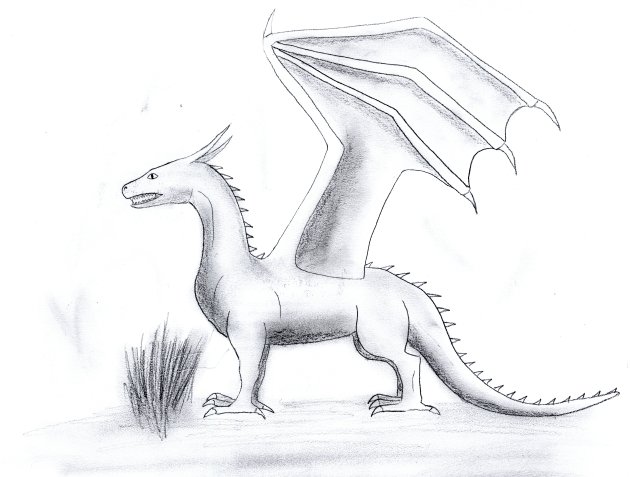
 Hübsch ... hässlich oder? ;-) Aber davon wollen wir ja wegkommen, deshalb mache ich ja auch dieses Tutorial. Aber ich kenne keine Gnade, im nächsten Bild stosse ich Euch nochmal mit dem Kopf auf die schlimmsten Fehler die oft gemacht werden hrhrhr.
 Very ... ugly, isn't it? ;-) But we want to get away from this, that's why I am doing this tutorial. But I have no mercy, in the next picture I'll show you the worst mistakes which are made very often hrhrhr.
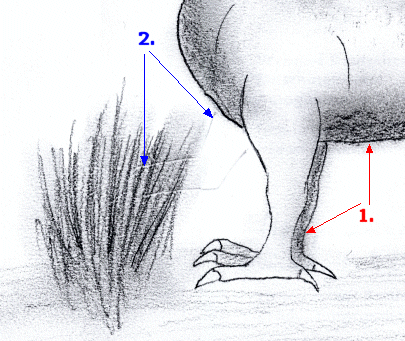
 Ein Punkt den ihr Euch GANZ schnell abgewöhnen solltet (1.) ist folgendes: Ein paar angedeutete Schattierungen die dann mit dem Finger verwischt werden... Dies ergibt erstens keine realistisch aussehende Schattierung und zweitens sieht das Bild dann einfach nur verschmiert und unsauber aus (und als ob ihr nicht genügend Zeit für eine richtige Schattierung hattet). Man kann mit demFinger einfach nicht so fein und präzise arbeiten wie mit dem Bleistift, so wird man immer über die Linie hinaus verwischen.
Ein weiterer Fehler der sehr oft gemacht wird ist folgender: Beim (Vor-)Zeichnen wird mit dem Bleistift viel zu fest aufgedrückt (2.). Das kann man nur sehr schwer wieder wegradieren. Außerdem... wenn man wie in diesem Bild z.B. versucht die Überbleibsel die man nicht wegradieren konnte durch einen Busch zu verstecken sieht man trotzdem noch wo man am Anfang so fest wie ein Pferd aufgedrückt hat.
Gah, also Bilder und vor allem Schattierungen wie solche werden wohl hoffentlich bald der Vergangenheit angehören. Jetzt habe ich Euch gezeigt wie man es nicht tun sollte, auf den folgenden Seiten erfahrt ihr jetzt wie man es besser macht.
 One thing you should outgrow fast is the following: Some unexplicited shading (1.) which you smudge with your fingers afterwards... This doesn't look like a realistic shading, and it also just looks smuged and unclean (and like you didn't have enough time for a real shading). You simply cannot work as precisely with your finger as you could do it with a pencil, you'll always smudge above the lines you have drawn.
Another mistake which is made very often is that people draw with too much pressure from the beginning (2.). This is very difficult to erase later. Also... if you try to hide the remains of this drawing you couldn't completly erase behind some shrubs you'll still see where you have drawn with too much pressure at the beginning.
Gah, I hope such pictures and shading will remain in the past now. I have shown you how not to shade, now on the following pages I'll show you how to make it better.
Bleistifte & Co. / Pencils and stuff
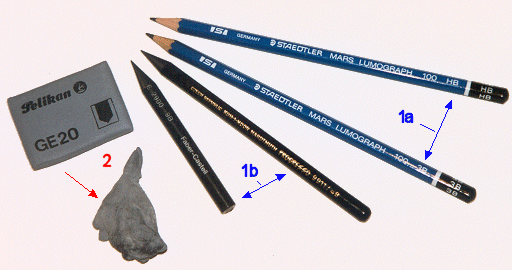
 Zum Zeichnen braucht ihr natürlich auch Stifte (D'oh, echt? *grins*). Nur soviel, ihr solltet einen etwas härteren Bleistift zum Vorzeichnen und für die hellen Stellen haben. Ausserdem noch mindestens einen weiteren der weicher ist für die dunkleren Schattierungen. Dafür ist sowohl ein Bleistift (1a) als auch ein reiner Graphitstift (1b) geeignet, je nachdem was Euch mehr zusagt. Was ich Euch allerdings sehr ans Herz legen möchte ist der Knet-/Radiergummi (2). Diese Art von Radiergummi hinterlässt keine Fussel auf dem Bild, er nimmt die Farbe quasi auf. Ausserdem kann man ihn so verformen (roter Pfeil) und kneten wie man ihn braucht, für sehr feine Stellen kann man ihn spitz kneten und die überschüssige Farbe wegtupfen. Lediglich Sachen wo man zu fest aufgedrückt hat (was man ja nicht sollte *g*) bekommt man damit nicht spurlos weg, dafür muss man einen herkömmlichen, harten Radiergummi nehmen.
 Of course you need pencils to draw (D'oh, really? *grins*). You should have a hard pencil for the design of the drawing and for the light parts of the picture. You also need at least one pencil which is softer for the darker shading. You can use a normal pencil (1a) or a graphit pencil (1b) for this, whatever you prefer. One thing you really should have is a soft rubber (feels and can be used like knead) (2). This kind of rubber doesn't leave any lints on the paper, it just takes the color away. You can also form this rubber (red arrow) the way you need it, you can knead it pointed for example to dab away some color. Only if you have drawn with too much pressure (which you shouldn't do *g*) you will have to use a normal, hard rubber.
|